|
|
August 22, 2023
Summer Issue #9
|
Weekly activities and lessons to keep your child thinking and progressing all year long. |
|
“Good decisions come from experience, and experience comes from bad decisions.”
|
|
Hello and Happy Tuesday,
Sadly, this will be the last edition of The File's Summer edition. It will be back next week with a few modifications to better fit the fall season and the sudden busyness caused by the start of another school year. I hope that you and your child have a smooth and happy transition into the new school year and that all your dreams for a good year come true :-) Have fun with this week's learning activities.
If you know anybody who you think would benefit from the weekly learning activities in this flyer, please share it with them and encourage all your friends to join The McManus Files mailing list by following the links on this page.
Peace,
Mr. McManus
|
|
If you feel your child might benefit from an individual or group tutoring program to prepare them for the next phase of their education, please contact McManus Tutoring.
Programs are structured so that students learn independence, accountability, and self-reliance. They will develop a repeatable structure that can be used to build success in the future.
|
|
The Wild Way Home
•••
by Sophie Kirtley
|
|
|
|
This is a beautifully written children’s book. Charlie Merriam lives next to a wood where he plays with his friends. But, when his brother is born with a heart defect, Charlie flees into the woods to try to outrun his emotions. He stumbles upon an ancient tooth with a hole in the middle that transports him back to the Stone Age where he meets a boy called Harby, and Harby has troubles of his own. Charlie embarks on a journey of growth and revelation in a strange yet familiar forest. It’s a story about life, about how it can be cruel to us and how we can work to get through those tough times . . . together. This is, without a doubt, one of the most touching and heartfelt tales I have read in many years. The book's message is needed in these trying times that we are living through. Just a wonderful story and read aloud that the whole family will enjoy and remember for a long time.
Enjoy!
|
|
|
|
|
|
|
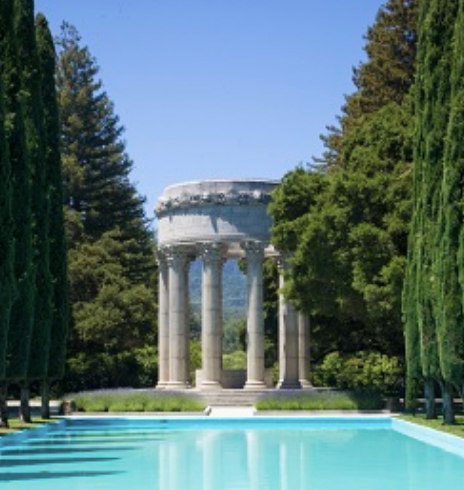
Pulgas Water Temple
A great place to learn about our water source and the Ohlone, have a picnic, throw a frisbee, and roll down a grassy hill...
|
|
|
|
|
San Francisco built Pulgas Water Temple as a monument to the engineering marvel that brought Hetch Hetchy water more than 160 miles across California from the Sierra Nevada Mountains to the Bay Area. The Hetch Hetchy Project took 24 years to build through the Great Depression at a cost of $102 million.
On October 28, 1934, the roar of Hetch Hetchy mountain water greeted everyone gathered at Pulgas Water Temple to celebrate its arrival. With vivid memories of the fire that had raged unchecked after the Great Earthquake of 1906, the city rejoiced in its new secure, plentiful supply of high quality drinking water. The frieze above the columns expresses the city’s joyful relief: “I give waters in the wilderness and rivers in the desert, to give drink to my people.”
Pulgas Water Temple was designed in the Beaux Arts style by William Merchant, a San Francisco architect trained by Bernard Maybeck. Merchant’s design featured fluted columns and Corinthian capitals to reflect the architecture of ancient Greeks and Romans, whose engineering methods were used to build the new water system. Artist and master stone carver Albert Bernasconi brought Merchant’s drawings to life.
|
|
What Makes Ice Melt Fastest?
If you've been to a place that gets cold in the winter, you have probably seen trucks out spreading a mixture of sand and salt on the streets after a snowfall to help de-ice the road. Have you ever wondered how this works? This basic chemistry project can give you some clues.
If you have ever made homemade ice cream the old-fashioned way using a hand-crank machine, you probably know that you need ice and rock salt to make the cream mixture cold enough to freeze. Similarly, if you live in a cold climate, you have seen the trucks that salt and sand the streets after a snowfall to prevent ice from building up on the roads. In both of these instances, salt is acting to lower the freezing point of water, and changing what phase of matter the water is (i.e., turning solid ice into liquid water).
For the ice cream maker, because the rock salt lowers the freezing point of the ice, the temperature of the ice/rock salt mixture can go below the normal freezing point of water. This makes it possible to freeze the ice cream mixture in the inner container of the ice cream machine. For the salt spread on streets in wintertime, the lowered freezing point means that snow and ice can melt even when the weather is below the normal freezing point of water. Both the ice cream maker and road salt are examples of freezing point depression.
Table salt (technically sodium chloride, or NaCl) when mixed with water is an example of a chemical solution. In a solution, there is a solvent (the water in this example), and a solute (the salt in this example). A molecule of the solute dissolves (goes into solution) because the force of attraction between the solute molecule and the solvent molecules is greater than the force of attraction between the molecules of the solute. Water (H2O) is a good solvent because it is partially polarized. (This polarization is caused by the distribution of electrons in the water molecule; specifically, its hydrogen ends have a partial positive charge, and the oxygen end has a partial negative charge.) Because water molecules are partially polarized, it is possible for them to arrange themselves around ions (which are molecules or atoms that have a charge), like the sodium (Na+) and chloride (Cl-) ions that make up table salt. This is why there is a greater attraction between the water molecules and the molecules of salt than there is between the molecules of salt by themselves, and why the water can dissolve the salt to create a salty solution.
Other substances when mixed with water can also lower its freezing point. The amount by which the freezing point is lowered depends only on the number of molecules dissolved, not on their chemical nature. This is an example of a colligative property. In this science project, you will investigate different substances to see how they affect the rate at which ice cubes melt. You will test substances that dissolve in water (i.e., soluble substances), like salt and sugar, as well as a substance that does not dissolve in water (i.e., an insoluble substance), specifically sand. Which substances will speed up the melting of the ice?
Terms and Concepts
- Freezing point
- Phases of matter
- Freezing point depression
- Solution
- Solute
- Solvent
- Molecules
- Colligative properties
Questions
- What is freezing point depression? When does it happen?
- How are solutions made?
- Which of the suggested test substances are soluble in water?
- Which of the suggested test substances are insoluble in water?
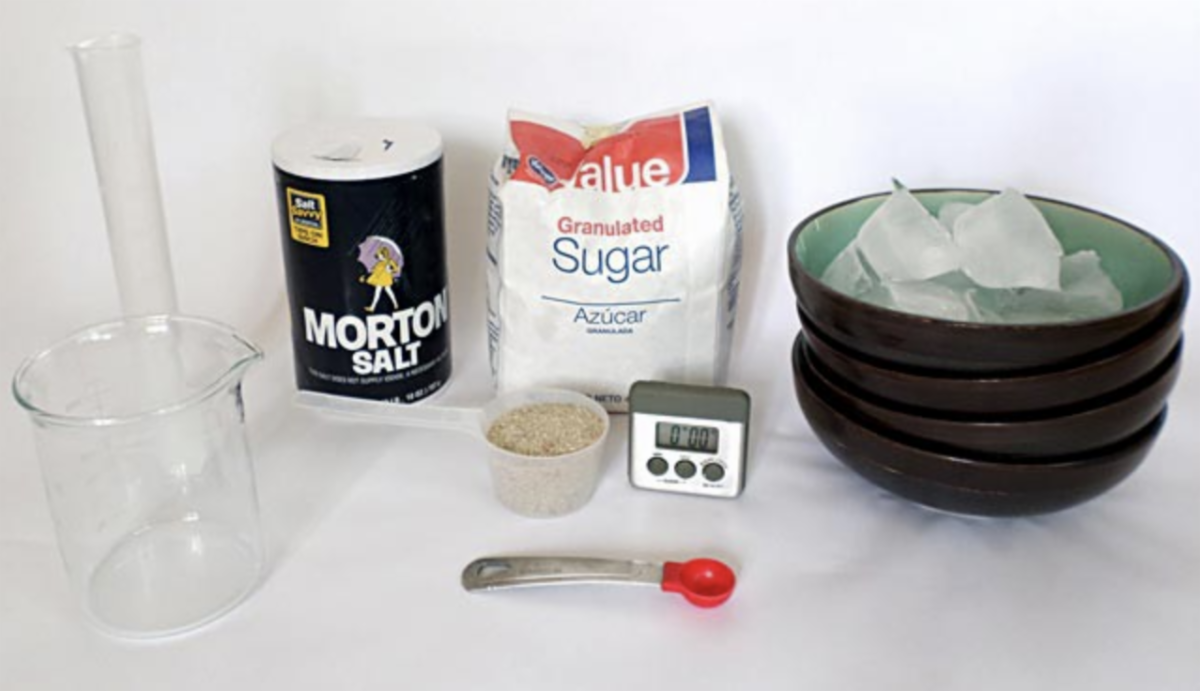
Materials and Equipment
- Identical bowls or saucers (4)
- Ice cubes (12). They should all be the same size and shape.
- Salt (¾ tsp.)
- Sugar (¾ tsp.)
- Sand (¾ tsp.)
- ¼ teaspoon measuring spoon
- Timer or clock
- Refrigerator. You will want an empty shelf that can hold all four bowls, unstacked, at the same time.
- 50 mL graduated cylinder, or smaller size.
- Large cup with a spout, such as some measuring cups. Alternatively you could use a funnel that fits in the graduated cylinder.
- Optional: Masking tape and a permanent marker for labeling the bowls
- Lab notebook
|
|
Experimental Procedure
1) Get the salt, sugar, sand, and measuring teaspoon ready to use nearby.
- Once you have set up the ice cubes in their bowls, you will want to quickly add the substances to the ice cubes so that they do not melt before adding the substances.
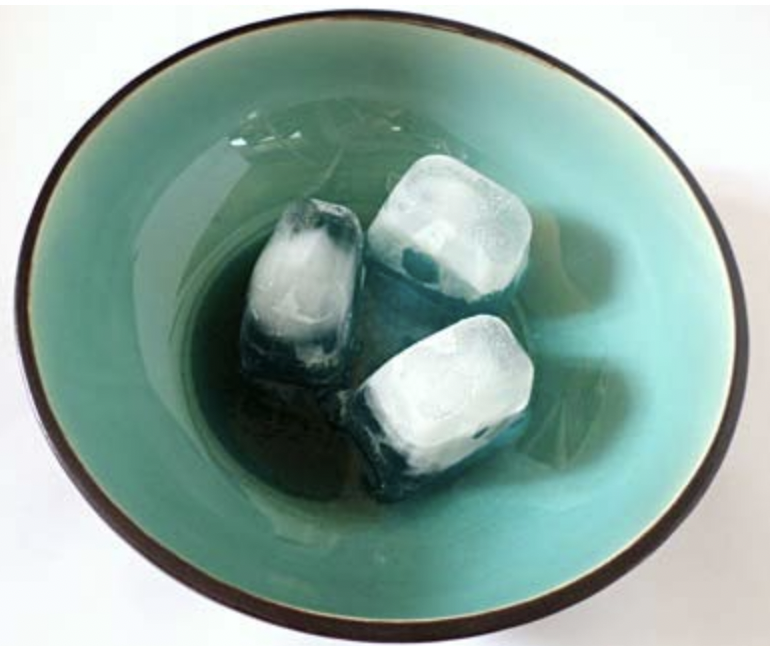
2) Into each of the four bowls, quickly place three ice cubes. Arrange the ice cubes so that only the corners are touching, forming a triangular shape.
-
Tip: If you are using ice cubes from a tray, it helps to let the tray sit at room temperature a little (for about five minutes) so that the ice cubes more easily come out of the tray and do not break into pieces.
|
|
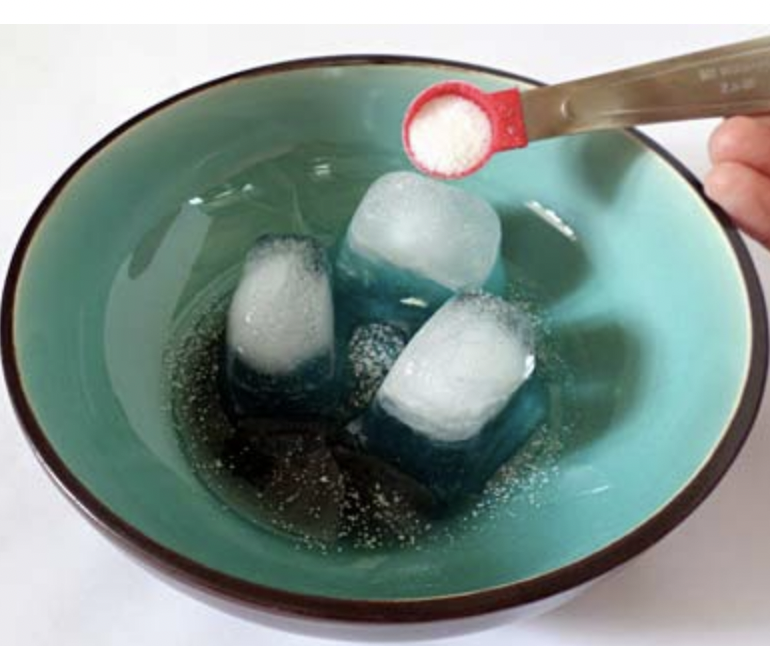
3)Carefully sprinkle ½ teaspoon (tsp.) of salt over the ice cubes in one bowl, as shown in Figure 3, below. Then sprinkle ½ tsp. of sugar over the ice cubes in another bowl, and ½ tsp. of sand over the ice cubes in the third bowl. Do not sprinkle anything over the ice cubes in the fourth bowl — it will be your control.
|
|
4) Move each bowl to an empty shelf in the refrigerator. If any of the ice cubes no longer form a triangular shape in their bowl, gently nudge the ice cubes to make a triangle again.
- You are doing this experiment in the refrigerator because it is easier to see the effects of colligative properties at colder temperatures. To think about why this is, imagine melting an ice cube on a hot, paved road compared to melting it in the refrigerator. The hot temperature of the road will make all of the ice cubes melt very quickly, which makes it harder to see the relatively minor effects of colligative properties on how fast the ice cubes melt.
5) Note the starting time in your lab notebook. Tell other people who may use the refrigerator that you are doing a science project and to not leave the refrigerator door open long as this could change the temperature of the refrigerator.
6) Check on the ice cubes every hour. When the ice cubes in one of the bowls have become at least half melted, take out all four bowls from the refrigerator and move on to step 7. (Be sure to take the bowls out before the ice cubes in two or more bowls have completely melted.)
- Depending on how cold your refrigerator is, it may take about four hours for the ice cubes to become at least half melted.
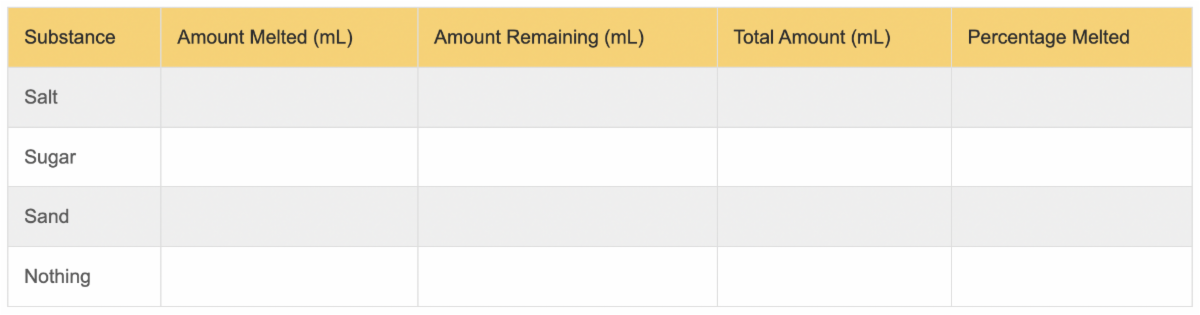
- While you are waiting, make a data table like Table 1 in your lab notebook.
|
|
7) Carefully pour the liquid water from one of the bowls into a cup with a spout, such as a large measuring cup. Make sure the ice cubes stay in the bowl, but get as much liquid into the cup as possible. Then carefully pour the liquid from the cup into the graduated cylinder. Record how much liquid was in the bowl (the amount of ice melted) in the data table in your lab notebook. After recording your results, clean out and dry the cup and graduated cylinder.
- Alternatively, you could use a funnel instead of a cup with a spout and funnel the liquid directly into the graduated cylinder from the bowl.
8) Repeat step 7 with the three other bowls.
- When pouring the liquid from the bowl with the sand, try to leave as much sand in the bowl as possible.
9) Now let the ice cubes completely melt in their bowls (you can leave them at room temperature). Once all of the ice cubes are melted, repeat steps 7–8 (but this time you will not need to worry about keeping the ice cubes in the bowls). Record the amount of liquid remaining in each bowl in your data table.
10) Calculate the total amount of water (originally in ice cube form) that was in each bowl. To do this, add the "amount melted" to the "amount remaining" for each bowl. Record the total amount for each bowl in your data table.
- For example, if the amount melted was 65 mL and the amount remaining was 25 mL, the total amount would be 90 mL.
11) Calculate the percentage of ice that was melted (when you first took the bowls out of the refrigerator) for each bowl. Do this by dividing the amount melted by the total amount.
- For example, if 65 mL was melted, and the total amount was 90 mL, dividing 65 mL by 90 mL would give you 0.72, which is the same as 72%. This means that 72% of the ice melted.
12) Clean out and dry the bowls. Then repeat steps 1–11 at least two more times so that you have done at least three trials total.
13) Did any of the substances you tested consistently speed up the melting of the ice (compared to the melting rate of plain ice cubes with nothing added)? If so, can you explain your results?
14) Now you are ready to create your science fair display board! If you need help making your display board, a downloadable display board template for this project is available for purchase below. The template provides step-by-step guidance for creating all the usual sections of a display board: title, abstract, background information, question, hypothesis, variables, results, conclusions, and acknowledgements.
Variations
- Does the melting rate depend on the amount of solute added? Design an experiment to find out.
- Investigate the effect of temperature on how colligative properties melt the ice cubes. To do this, try your experiment at different temperatures, such as room temperature or outside on a hot day. Be sure to monitor the temperature regularly throughout your experiment.
- Do other substances help melt the ice cubes more quickly or slowly? Identify some substances to try and then repeat this experiment.
- Do you think salt would melt ice in your freezer? Why or why not? Try it and find out.
|
|
Three Creative Writing Prompts
These prompts and questions will help jump-start your daily writing. Just as it's important to read for at least 30 minutes each day, you should also write for 30 minutes a day. Don't worry about your organization or spelling, just write!
"Beauty is everything, unless..."
"I’ve been to at least a hundred weddings since I began my career as a photographer, and I always..."
"My sister had always loved flowers, and I felt bad giving them to her after she..."
|
|
August 22nd Writing Prompts
Today is “Be an Angel Day.” Describe a time that you were an angel to another person, or a time that someone was an angel to you.
|
|
Creativity Corner
Set your art free
|
|
|
|
This landscape art project is terrific. The drawing technique is inspired by Ted Harrison and allows you to practice your creativity. You can use any color combination that inspires you. Learn how to create this Ted Harrison-inspired project by watching this video. |
|
|
|
|
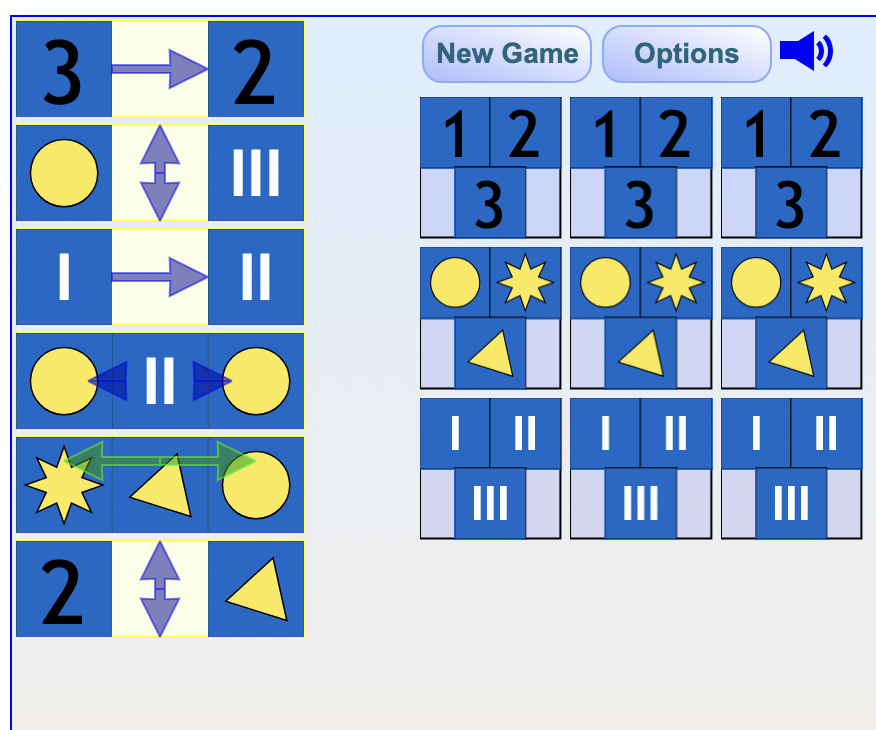
Play Master Detective
Click this link play the Master Detective Game. Can you use the clues to solve the puzzles. Please read the directions to become a true Master Detective.
|
|
|
|
|
|
|
|