SAL12 - Squaring Up Your Back! | |
|
Introduction
This is the twelfth in the series of emails based on Ruth Grihalva's April Power Point presentation to the String-A-Long Quilt Guild in Porter County Indiana. The title was "Piecing Hints, Tips & Longarming Issues."
Her comments are based on our experience with over 10,000 longarmed quilts in our 20 year history. Additionally, Ruth has published over 160 patterns, three books, and two tools under the nom de plume of "Raggedy Ruth Designs."
However, these newsletters are written by me, her husband. I am writing these from Ruth's presentation notes. Nonetheless, I will be sprinkling my ideas in, also.
| |
|
SAL12 - Squaring Up Your Back!
Intro -
In this newsletter we will explore "Squaring Up Your Back." Why? Because either you do it or we do it - you choose! The first option is easier for you and less expensive, because if we have to do it, it may result in a "non-longarming charge." After all, the purpose of these newsletters is to improve the end result - your finished quilt at the lowest price possible.
| |
In a previous newsletter titled "SAL11 - Setting Triangles!" we looked at some of the properties in fabric grain. In that newsletter, I referred to Hilarie's discussion, of the Little Stitch Studio, Norfolk, on her blog on the subject. Similarly, this time I will be looking at Cindy Carey's, of North Star Longarm Quilting YouTube video on the topic regarding squaring up quilt backs, which I recommend that you read at this time.
Discussion -
What is implied and stated in this video is that whether you cut your back with a rotary cutter, or rip it, it does not insure that the back is square with the grain. The reason for this is that, during the manufacturing and distribution processes, the fabric is attached to something and then wrapped, mechanically. This process happens several times before the fabric ends up on the bolt from which you cut or ripped your backing fabric.
Each time the fabric is attached and wound, pressure is put on the fabric. Since the attaching process may not be straight, stretching pressure is applied to the fabric. This pressure is not built up, and released when the fabric is cut. Instead, it simply distorts the fabric.
If that distorted fabric is applied to a quilt top, the result will be a distorted, or wonky, quilt. That is why Cindy Carey and Ruth Grihalva go through the process of truing, plumbing, or squaring the back. That should give you insight into one of the reasons that we require 5" of backing, beyond the top, all the way around the quilt: right, left, top, and bottom.
We have had instances where during the process of the squaring up of the back that we cut off 6" of unaligned fabric. That left us with a scant 2" remaining on the sides with which to work.
| |
|
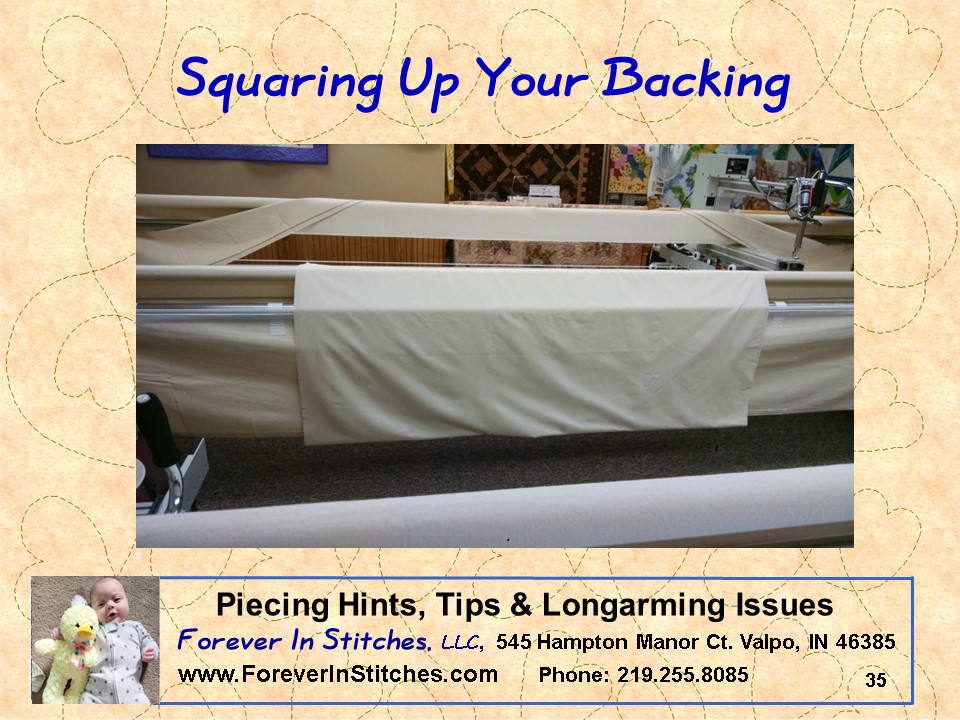
Shown here, in illustration #35, is what it looks like to us when we do the squaring process on one of our longarms.
Note the swales along the bottom fold as the back hangs from the horizontal bars. These are the problems that must be eliminated.
| |
|
After we have performed the steps below to square the back, note that the swales have been eliminated, as shown in illustration #36..
This will allow the quilt to be attached, straight, and will safeguard that we can easily longarm it.
So What? -
So what if you don't square the back? If you do not square your back, it may lead to unwanted problems - from the longarmer's as well as the customer's point-of-view.
| |
|
If one were to load a non-squared back on a long arm, we would see the loaded back looking like the graphic on the left in illustration #37. Now, let me be clear, I have never seen anyone load a back like that, because we have been trained to center the back on the roller bars.
Then, on the right graphic in illustration #37, one can picture how the top would look being loaded with that loaded back. The problem with that is that if the quilt had been one or more rows longer, then we would not have had enough backing fabric to match the top on the lower left side.
| |
|
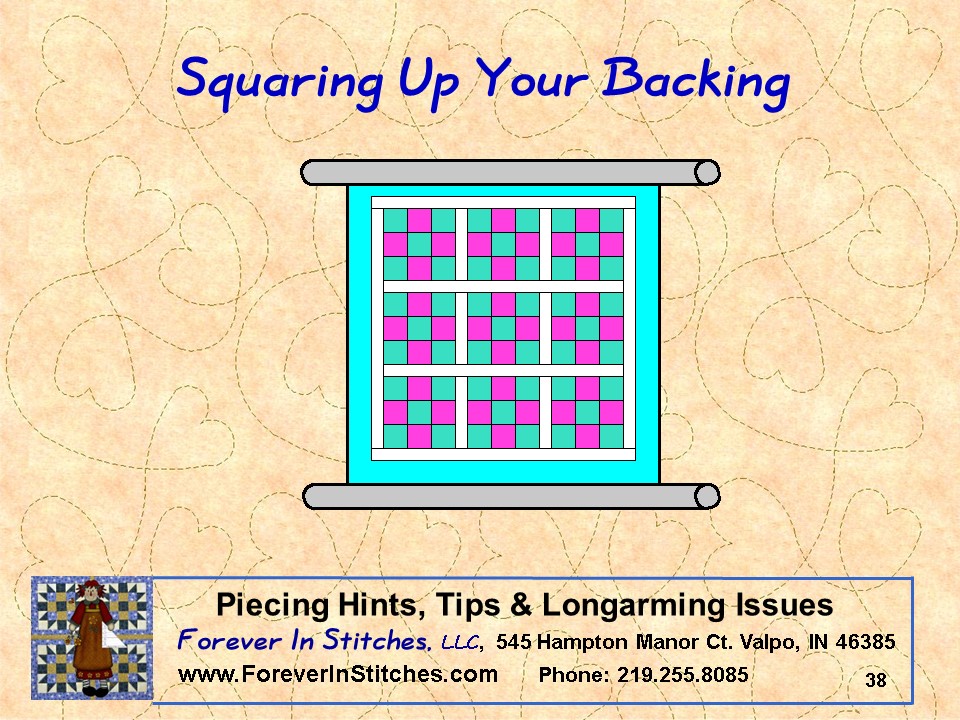
A square back and its corresponding top are depicted in illustration #38. Note that with this method there is plenty of uniform space around the quilt top.
The next obvious question is loading the non-squared back as if it were square. After all, when the fabric was cut, it was cut at right [90 degree] angles to the sides.
The problem with that is that those swales that you saw earlier will manifest themselves while you are longarming. The result will be wrinkled, or folded backing fabric on the quilt, which is not desirable.
To sum it up, in order to assure that your backing is not pinched and that your quilt lays flat, then square the back, making sure you have enough fabric left to quilt.
So what are the steps that one takes to square up a back?
| |
|
Steps -
The steps as shown in squaring up a back are as follows:
- Cut the backing fabric 10" larger than the top: i.e.; 5" bigger on every side.
- Fold the back, aligning the two selvedge edges together.
- Pick up the back holding two corners in each hand. If the back is too big, then ask a friend or spouse to help, or attach two of the corner to something sturdy. In the above illustration [#36], Ruth has done this using a horizontal longarm bar.
- Check to see if the fabric hangs straight, or has a swale in the bottom fold.
- If a swale exists, then slide one of the selvedges, horizontally, right or left, while holding the other side in a fixed position, until the swale ceases to exist and hangs straight and flat.
- Holding the selvedges in that position, put the back on the cutting table.
- Using a large template, placed square with the selvedge, making sure that all layers in the fold will be cut, trim off the fabric that does not align. Do this on both sides of the back.
| |
|
What's Next?
The next email in the series will be titled "SAL13 - Isn't 5" enough?"
| |
If you would like to have Ruth give a presentation or workgroup to your organization, please let me know by email to RickG@ForeverInStitches.com [with your complete contact information, please] or by phone at 567.208.3572, my mobile. | |
Al Fin
I trust that this was of assistance or interest. If you have any questions that need to be answered, on this or other longarming or quilting topics, then please write to me at RickG@ForeverInStitches.com or call 219.255.8085.
Thank you for your time and interest.
| |
May The Lord Richly Bless You!
Rick & Ruth Grihalva
| |
At Forever In Stitches our goal is to further the art of quilting and longarming.
We thank you for your interest in our newsletters. We try to keep our newsletters informative, instructive, and enlightening, in addition to informing you of specials. Please join our private mailing list! Remember to forward applicable newsletters to friends who may benefit from the information contained in them!
Please note that a history of our newsletters, since the second quarter of 2022, can be found on our web-site: ForeverInStitches.com.
| | | | |