4539 Anderson Ave, Manhattan KS 66503
Garden Store 785-539-2217
Landscape Office 785-539-2671
|
|
|
|
Veggies in Containers - Nancy's Notes
|
|
Why garden in containers you ask? There are many reasons to use containers, one of which you may have very poor garden soil and are struggling with results. You may have limited space, or not enough sun in the garden area. Containers give you the flexibility of changing plantings with the seasons or even location of your pots.
When you choose a spot for placement, make sure your sight receives at least 6 hours of sunlight. If you have a place where the sunlight moves locations, you might consider placing a rolling tray under your pot so that you can move it with the sun. It would be a good idea to provide some protection from the prevailing winds, as you know Kansas winds can be brutal.
Choose a container that is large enough, and heavy enough to accommodate a full-grown plant. I would not choose anything smaller than a 14" diameter. Always provide good drainage, adding adequate drainage holes if needed. There are many types of materials available - plastic, clay, glazed or even wood. All work well.
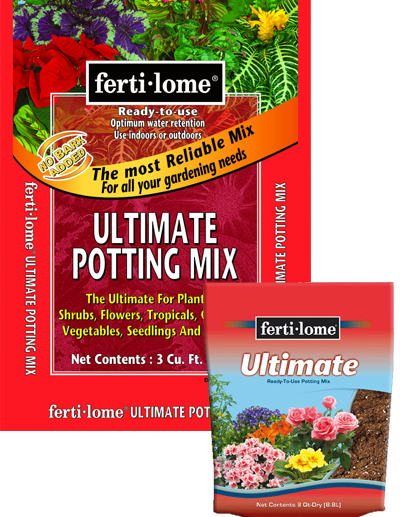
Use good quality potting mix. We use ferti
·
lome Ultimate Potting Mix. It is a lightweight, soil-less mix that works perfect for container gardening. Do not use soil that comes for your garden or purchased topsoil.
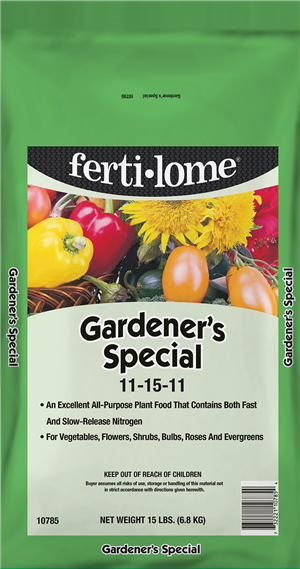
Fertilize frequently with a soluble fertilizer such as ferti
·
lome Gardener's Special. Once a week would
be ideal. We also have many organic options available.
You can pla
nt many
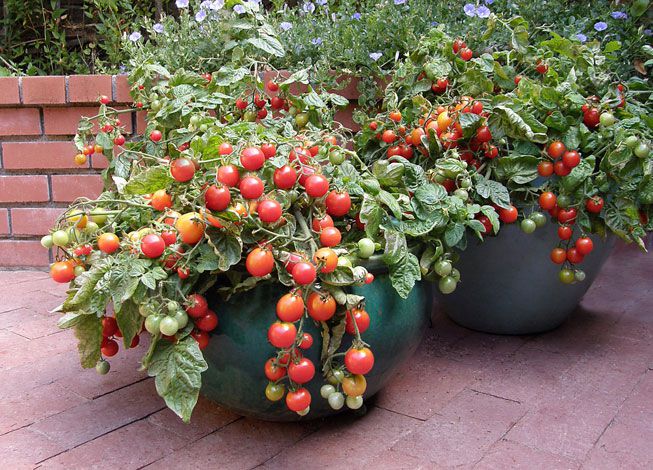
different types of veggies in a container. Green beans, lettuce, tomatoes, peppers, the list goes on. Many varieties now have a smaller size just perfect for a pot. You may consider using a trellis or tomato cage for a vining crop to climb such as peas, beans or cucumbers. Remember when choosing a tomato plant that you choose one that stays smaller and not an indeterminate variety.
This year I am trying potatoes in large containers. With limited garden space I thought this would be a great option so I can still enjoy my new potatoes while allowing room to grow all the many other plants I want to enjoy. I will let you know how they turn out this year!
Stop by our greenhouse and visit with Tyler or Lindy and view many of the options available. We even have examples growing in our second greenhouse!
|
|
Wildlife Habitat - Derek's Discussion
|
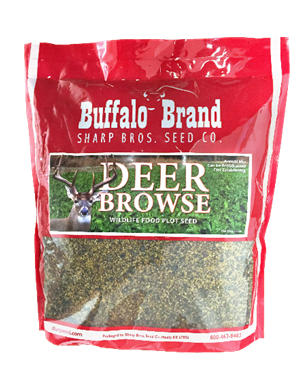
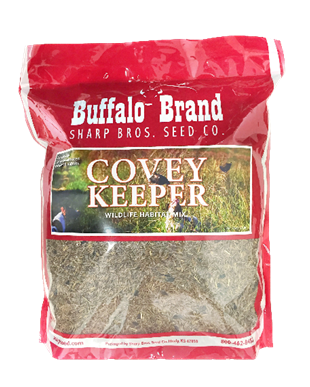
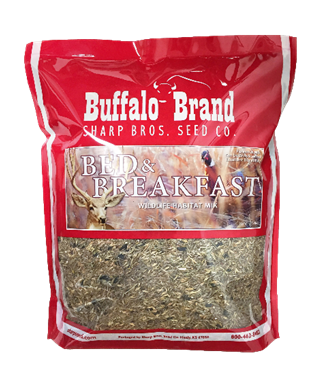
This spring we have added several new seed mixes to the shelves in our store. Put together by Sharp Brothers Seed Co. out of Healy, Kansas, these mixes can be used in a variety of ways with their main purpose being wildlife habitat.
Sharp Bros. Seed Co. has been producing, harvesting, conditioning and planting seed for multiple generations as one of the largest working seed producers in the U.S. For years they have supplied Blueville Nursery with high quality native grass seed including buffalograss for high quality warm season lawns. With the addition of their wildlife mixes we are able to serve an ever popular interest in wildlife management.
Whether you simply enjoy watching deer, turkey, quail, and waterfowl or you hunt them as a hobby, utilizing food plots as attractants is a successful strategy. Food plots have the added benefit of adding organic matter to the soil which improves tilth and soil heath.
While the majority of these mixes are intended for wildlife management, several have native grasses and forbs that can be used in conservation plantings. Included in the line-up from Sharp Bros. are mixes that will benefit bees and butterflies. From big game to butterflies we have a seed mix that will attract the best!
|
|
Greenhouse Fun - Tyler's Tips
|
|
Spring has finally arrived! The greenhouses are filling up fast with blooming annuals, beautiful vegetables, and aromatic herbs. This week we received some great looking strawberries, just in time for planting! We also got in some beautiful looking tomato and pepper plants. While it's still a little too early to plant those, it's never too early to start thinking about what varieties you want to try this year. Don't miss our Tomato and Peppers for Salsa Seminar on April 21st with Gregg Eyestone of K-State Research and Extension to learn about those. New shipments are arriving almost every week so be sure to stop by and see what exciting new plants we have in store. Aside from that, I've also got a few exciting experiments going on in the back of the greenhouse this spring. This article will touch on those and I'll let you know how you can try them yourselves at home!
Container Gardens
My first experiment I'm working on is growing some vegetables in window boxes. For this I'm using radish seed and arugula seed. I planted my radishes in a window box measuring 8" X 24" on March 3
rd. I spread the seeds in rows fairly close together and barely covered them with soil. After about a week or so I saw emergence and by March 17
th there was enough growth to thin them. To thin, I simply pulled out sprouts that were close together and transplanted them into other window boxes full of soil, making sure the roots were firmly packed into the soil. I was able to fill about four other boxes and still had an abundance of sprouts in my original box.
I planted my arugula on March 10
th using the same method. I noticed emergence about five days later. At this point, there is still not much growth.
|
|
 |
| Radishes 10 Days After Planting |
|
|
|
|
| Original Box of Radishes 3 Weeks After Planting |
|
|
|
|
| Radishes 10 Days After Being Thinned |
|
|
|
|
Arugula 3 Days and 2 Weeks After Planting |
Hydroponics
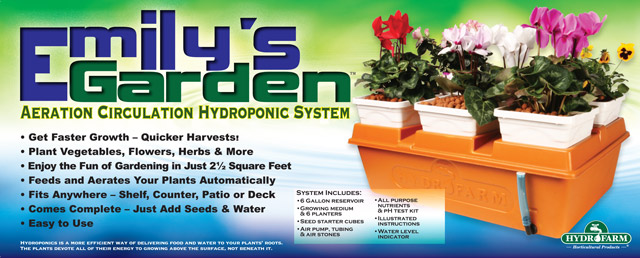
Another exciting experiment I have going on is a hydroponics system. This one has been a really neat learning experience for me. For those that may not know, hydroponics is a method of growing plants without soil. Instead, you use another form of growing media and a mineral nutrient solution in water. In my case, I'm using clay pebbles.
For this I used a hydroponic system available in the store called "Emily's Garden Aeration Circulation Hydroponic System". I started my seeds in a product called "rock wool" provided in the kit. Instructions said to soak the rock wool cubes in water with a pH of 5.5-6.5 (I used vinegar to achieve this pH) for 12 to 24 hours. After soaking my cubes, I planted seeds in each one. I used spinach, lettuce, beets, basil, lemon balm, and cilantro. Once planted, I placed them in a black growing tray and covered with a clear humidity dome, misting with water occasionally to keep moist. I noticed sprouts in about half the blocks after 10 or so days. Shortly after that, some sprouts did start to die off.
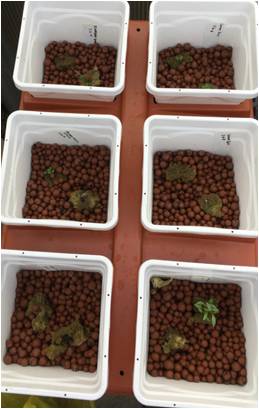
After this, I placed them into the hydroponic system. This is an orange tub that gets filled with water and has two air stones inside to aerate the water. I then placed each planting container in to the solution and filled with the clay pebbles. I placed each rock wool in the pebbles, making sure the bottom of them was touching the water. After about a week, I'm noticing some good leaf growth as well as root growth.
I'm also starting another set of seeds as the original didn't go quite as well as it should have. For this batch, I'm using "A-Ok" rock wool and following their directions. I only soaked this cubes for about 10 seconds and used a mineral solution with phosphorus (provided in the kit) to adjust my pH. I also didn't squeeze the excess water out of the cubes like in my original batch and I'm using a humidity dome that has some ventilation. After about five days, I began to seed sprouts emerging out of these cubes. They're still under the humidity dome and I'm doing a better job of keeping these moist. They appear like they'll turn out much better than the original batch.
|
|
|
| Original Set of Seed Starts 1 Week After Planting |
|
|
|
|
New Set of Seed Starts 1 Week After Planting |
|
|
| Seed Starts 1 Week After Being Placed in Hydroponic System |
Growing in Bags of Soil
My final experiment came from an idea I saw on Facebook. Someone was growing lettuce using nothing but seeds and a bag of potting soil. I thought it was a really innovative and simple idea so I thought I'd give it a try. I have one bag of ferti
·lome Ultimate Potting Mix with Buttercrunch Lettuce, and one bag of Fox Farm Ocean Forest Potting Soil with Mixed Leaf Lettuce. To do this, I first roughed up each bag to break up the soil and sliced some small holes on the backside of each back to provide drainage. I then cut out a square on the front side of each bag leaving about a one inch border all the way around. After that I loosened up the soil one last time just to make sure there weren't and clumps left and planted three rows of seed in each bag. These were planted on March 13
th and I noticed some emergence around five days later. At this point, there is still good growth going on in each bag and it's looking like they will have a promising crop.
|
|
|
Lettuce Seeds 2 Weeks After Being Planted |
|
|
| Lettuce Seeds Planted After Being Planted |
Please feel free to come out and take a look at these experiments for yourself! They're located in the back of our second greenhouse and I'd be more than happy to answer any questions you may have.
"In the spring,at the end of the day, you should smell like dirt"- Margaret Atwood
|
|
Spring Clean Up
- Lindy's Letters
|
| Oh. My. Goodness!!! Just when you think you're used to living with Kansas weather, she pulls a mean trick like snowing on Easter! Almost thought I had lost my pansies, but they seem to have recovered nicely. They're tough. And, even though this last cold snap has put a damper on our moods, we are tough too! The cold days have given us some extra time for dreaming and planning.
We did have to make a few adjustments. You may have had to cover a few things in your yard. And here, we still have a large stock of great plant material. We've just tucked our tender, beautiful, early bloomers away for a few days so we will be able to enjoy them a little bit longer once Mother Nature comes to her senses!
Also, quite a few of our plants still have tight enough buds to protect themselves. I've had a lot of people asking if it's okay to plant. Now is a great time to plant any trees or shrubs! It will give them a great start to get their feet in before summer hits. Let's not forget, last year at this time, we were
running around in 75 degree weather, some of us wanting to plant tomatoes!
(Way too early) Spring IS coming, people!
I'm still excited about our large spring selection of perennials coming in this week. We'll have everything from plants to feed your butterflies to ground cover and shade plants you can put in those shady areas where "nothing seems to grow".
Also, this time, I wanted to talk a little about cleaning up some of your established plants for spring. Go ahead and finish clipping and pulling the die back from your perennials. If you haven't already, you should be noticing some new green foliage popping up. It will be a lot easier to get the old off now, before that green really gets going. There is still a chance of some frost damage to new tender foliage; it will recover nicely and more easily without having to push through all that brown.
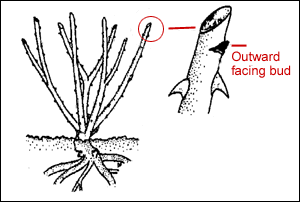
As far as roses, crape myrtle and butterfly bushes, go ahead and cut them down to about 18 inches. With roses, you will want to find a bud
pointing outward, away from the center of the plant and clip just above that. Do this on each stem you cut. Reason being, that bud will grow into a branch, and you want to encourage that branch to grow outward. Much like thinning out your other shrubs, you want as much air and light to go through the middle of your plant as possible. This will help discourage disease and promote the health of your plant.
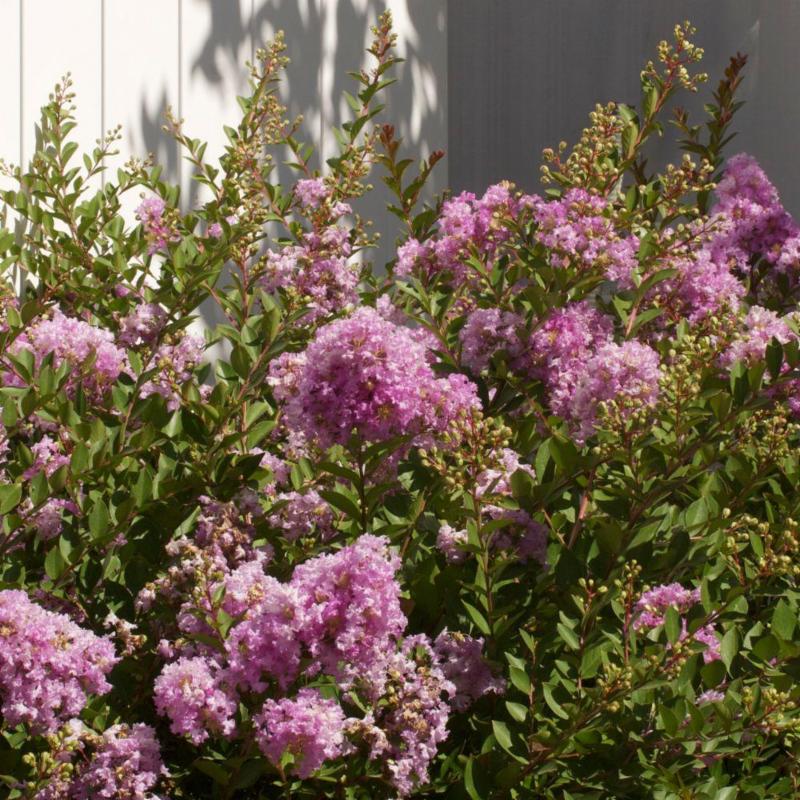
Crape myrtle, you can just chop. You don't have to be careful about where to cut them because they will grow however they want to grow. The thing to remember about these plants is patience. I say cut to 18 inches just as a general rule of thumb. There are years when we have had a hard, cold winter and spring where they freeze all the way down to the ground. That is perfectly okay. They will grow back just as beautiful and healthy from their roots. People tend to see all their other plants greening up and nothing coming from the crape myrtle. Just be patient. I think they're pretty smart plants that aren't normally fooled by Kansas weather. Sometimes not showing any sign of life until well into May. The same is true for butterfly bushes.
So, while we may not feel like working in the yard on these cold spring days, we can take the few extra days to prepare. Come on out and see us at the store. Ask questions. Let us help you plan. Don't forget, at Blueville the advice and coffee are always free.
|
|
April Agenda - Katie's Korner
|
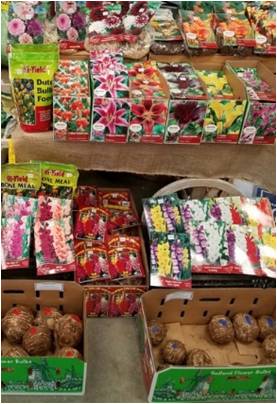
Spring Bulbs
Spring bulbs arrived at the store in March with
Gladioli, Asiatic Lilies, Cannas, Dahlias and Elephant Ear. Although you won't plant these bulbs until May, get your choices now because when they sell out there will be no more. One variety of Lilies we have available are Stargazer. Those have been really popular in past experiences. The Elephant Ear can be started inside in a very large pot, and moved outside at the right time of year, if you do not want to plant them in the ground. Gladioli make nice cut flowers, and Cannas are used in landscape borders or summer containers as centerpieces.
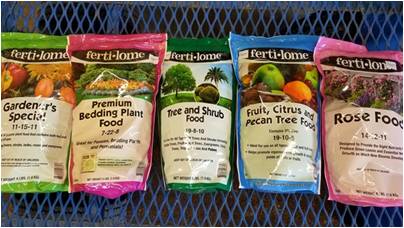
Fertilizing Plant Material
Attend our "Amend, Feed, Protect-Simple Steps to Grow Better" seminar with our Soil Mender rep Dave Young on Saturday, April 7
th.
Spring is the time to be fertilizing your plant material. We have
ferti
·
lome Tree & Shrub Food, ferti
·
lome Rose Food, ferti
·
lome Gardener's Special, ferti
·
lome Bedding Plant Food to name a few in granular form. Sprinkle these around the base of plants, and water, to feed plants a little bit to improve overall health and vigor. We have an abundance of fertilizer choices in the store to meet your needs, that are not listed here. This year
Natural Guard
has come out with a new line of
organic fertilizers
we have added to the shelf, and
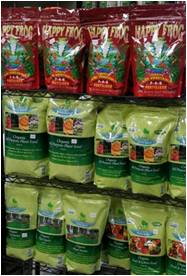
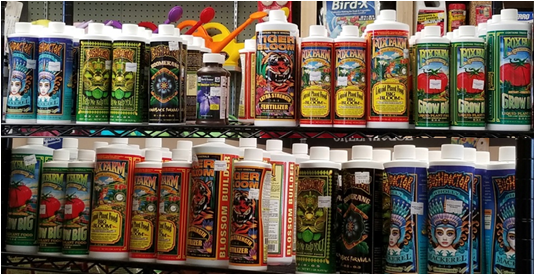
we also expanded our Fox Farm liquid fertilizer line.
In the store we've pulled out the natural and organic products and created a section for customers to easily shop through them. Come check it out!
|
 |
|
What to do in April
|
¨
Plant trees, shrubs, perennials, cole crops, pansies, snapdragons & petunias
¨
Prune overgrown junipers and yews
¨
Spray apple and crabapple trees for cedar apple rust
¨
Check pines for disease
¨
Prune, uncover, fertilize and plant roses in early to mid-April
¨
Seed or sod cool season grass
¨
Fertilize perennials
¨
Tune into 1350 KMAN Radio every Saturday morning at 8:06 am for Blueville's Horticulture Hints!
|
|
Events for April
|
- Grow Better Seminar- April 7th @ 10 a.m. with Dave Young from Soil Mender
- Geranium Sale- April 13-14. $2.99/4 Pack or $21.00/flat. Wear pink and get an extra 10% off. A portion of proceeds benefits Johnson Cancer Research Center
- Tomatoes & Peppers for Salsa- April 21st @ 10 a.m. with Gregg Eyestone of Riley County K-State Research and Extension
- Arbor Day Sale- April 27-28. 25% off all container trees.
|
|
What's New?
|
- Rhubarb in 1 Gallon Pots
- Strawberry Plants
- Brambles
- Natural Guard Organic Fertilizer Line
- Glove Wall- Kids gloves, chemical resistant gloves, water proof gloves, bamboo gloves and rose gloves. More sizes of existing varieties as well
- Rogue Hoes
- Soil Knives
|
|
Attention
|
- If you would like to receive e-mails regarding store promotions and discounts, please e-mail Derek at [email protected] to subscribe
|
|
|
|
|