SHARE:  


At Taylored Expressions, we love it when we hear from our fans with requests for tips on multiple uses for our products. We have 
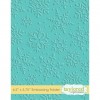
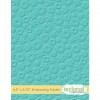
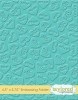
60 unique Embossing Folders in the TE Store! Did you know that you can do so much more than simple dry embossing with them? Lucky for us,  
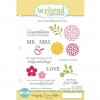
Creative Team Member Melody Rupple shows us what can happen when our Embossing Folders are paired with different materials. Plus, she created a gorgeous card project to highlight this feature!

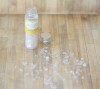
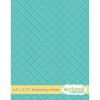
You can experiment with any thin material that can go through your die cutting machine. 


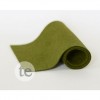
Above, Melody used foil, canvas, and even thin craft leather!


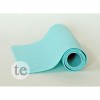
Give acetate or fun foam a try like Melody did in the above photo! Consider embossing treat bags and gift packaging to make them a little more special. 

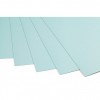
For an elegant look, try embossing on vellum. Keep scrolling down for Melody's step-by-step tutorial on how to create a gorgeous wedding card using this easy-to-use material:

 
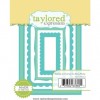
Melody used our Damask Embossing Folder on today's project.


Let's get started!

 
Use the Damask Embossing Folder to emboss a piece of vellum to fit inside the largest frame from the Frame in Frame Cutting Plate. Cut the frame from Sugar Cube cardstock. Cut an A2 card base from Sugar Cube cardstock and a piece of 4-1/8 " x 5 3/8" Sprinkles cardstock to fit around the frame. 

 
Glue the vellum to the back of the card frame (raised pattern down) and add a few Snow Flurries Sequins to the Sprinkles cardstock. The sequins will show faintly through the vellum, but will not add bulk.

 
Adhere the card front to the card base. Die-cut a flower with the Bloomers 1  die from Tiffany  and Marshmallow Felt . Cut leaves with the Bloomers Greenery  Die from Moss Felt . Stamp the sentiment from the Happily Ever After  stamp set in Delicata Silvery Shimmer Ink and heat emboss with Silver Embossing Powder. Die-cut the sentiment with Stitched Banners Stacklets

 
Adhere the sentiment and use a 3D thin foam square to attach the flower to the card. Use glue to attach the leaves to the card and finish off with a few more sequins. 


Thank you, Melody, for sharing this wonderful project and tutorial with us!
To view our full line of Embossing Folders, visit the TE Store HERE.

Supplies Melody used today:


We've been celebrating Embossing Folders all this week on the TE Blog! Stop by for more tips and tricks using these handy tools and find out how to create two more amazing projects from our Creative Team:

Adding Texture with Paste with Keia Shipp-Smith
Watercolor & Embossing Folders with Kerri Michaud
 
Stay Connected


Stay connected with TE between newsletters by clicking on any of the icons above!
 
New to Taylored Expressions? Find answers to Frequently Asked Questions as well as information about our stamps, dies, tools, paper and much more by clicking HERE.
 
Thanks for taking time to connect with TE today! If you ever have any questions or comments please do not hesitate to email us at support@tayloredexpressions.com.
 
Join Our Mailing List!