Stepping Stone School
Supporting Families & Learning at Home
July 24th
|
|
At
Stepping Stone School, our mission is to offer exceptional nurturing and education for our students, and extraordinary support and care for all parents and families!
Many families are finding new and creative ways to engage and educate their children while at home. We compiled a list of fun and educational activities and resources for you to use with your family.
WE ARE HERE TO SUPPORT YOU!
|
|
Community & Cultural Awareness
|
Nine Steps for Translating Into Freddish
Arthur Greenwald and another writer named Barry Head coined the term Freddish. They later created an illustrated manual called “Let’s Talk About Freddish,” a loving parody of the process of getting all the words just right for Rogers. “What Fred understood and was very direct and articulate about was that the inner life of children was deadly serious to them,” said Greenwald.
Per the pamphlet, there were nine ways to translati into Freddish:
- “State the idea you wish to express as clearly as possible, and in terms preschoolers can understand.” Example: It is dangerous to play in the street.
- “Rephrase in a positive manner,” as in It is good to play where it is safe.
- “Rephrase the idea, bearing in mind that preschoolers cannot yet make subtle distinctions and need to be redirected to authorities they trust.” As in, “Ask your parents where it is safe to play.”
- “Rephrase your idea to eliminate all elements that could be considered prescriptive, directive, or instructive.” In the example, that’d mean getting rid of “ask”: Your parents will tell you where it is safe to play.
- “Rephrase any element that suggests certainty.” That’d be “will”: Your parents can tell you where it is safe to play.
- “Rephrase your idea to eliminate any element that may not apply to all children.” Not all children know their parents, so: Your favorite grown-ups can tell you where it is safe to play.
- “Add a simple motivational idea that gives preschoolers a reason to follow your advice.” Perhaps: Your favorite grown-ups can tell you where it is safe to play. It is good to listen to them.
- “Rephrase your new statement, repeating the first step.” “Good” represents a value judgment, so: Your favorite grown-ups can tell you where it is safe to play. It is important to try to listen to them.
- “Rephrase your idea a final time, relating it to some phase of development a preschooler can understand.” Maybe: Your favorite grown-ups can tell you where it is safe to play. It is important to try to listen to them, and listening is an important part of growing.
|
Mister Rogers Activities
- Can you define the word “neighborhood”?
- What makes a good neighbor?
Mister Rogers always conveyed kindness.
- Can you explain your idea of kindness in words?
- Can you illustrate what kindness means to you?
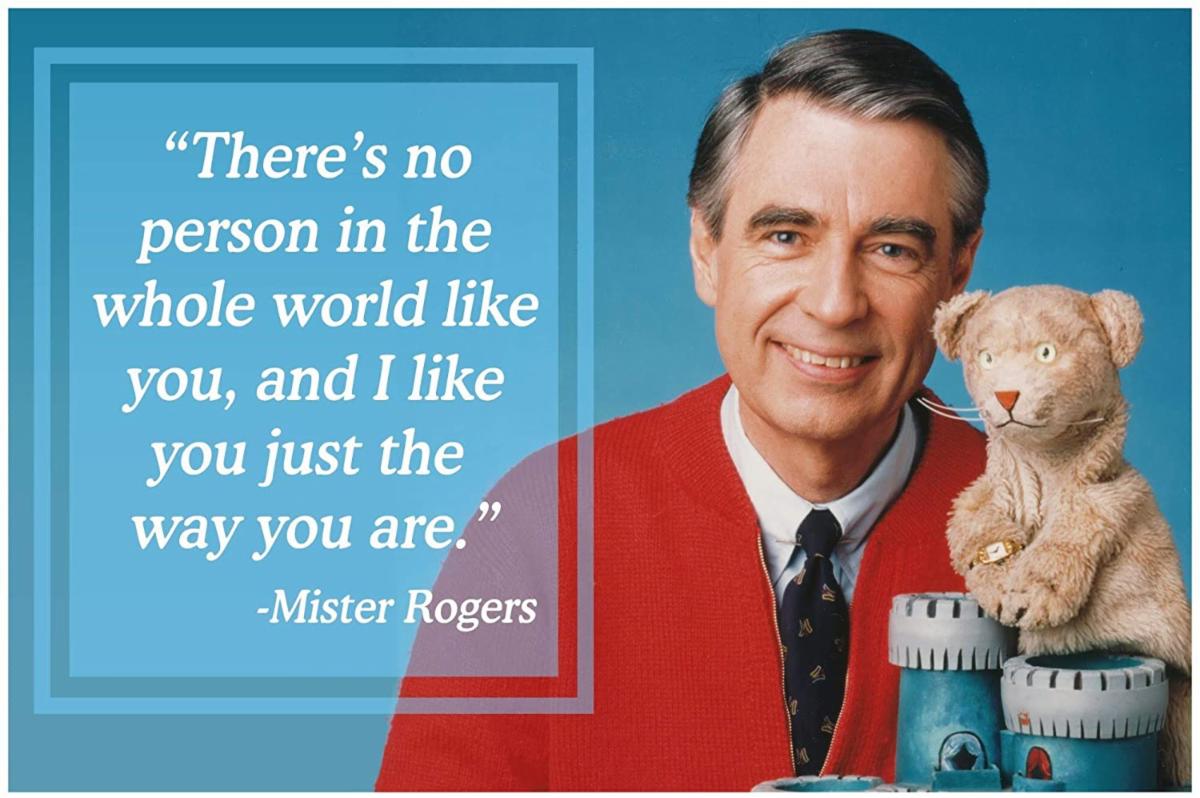
Mister Rogers used to say, “You are a very special person. There is only one person like you in the whole world.”
- What are some of the things that make you special?
- Can you write a poem that's titled “I’m Special"?
Mister Rogers’ favorite number was 143 because it represented the number of letters in each word of “I Love You.” Make a chart of numbers that represent the following, then choose your favorite number and write a paragraph or draw a picture that best explains your choice.
- I Care About You
- You Are My Friend
- I Am Happy
- It’s You I Like
- I Am Brave
- Let’s Be Neighbors
- I’m Proud of You
|
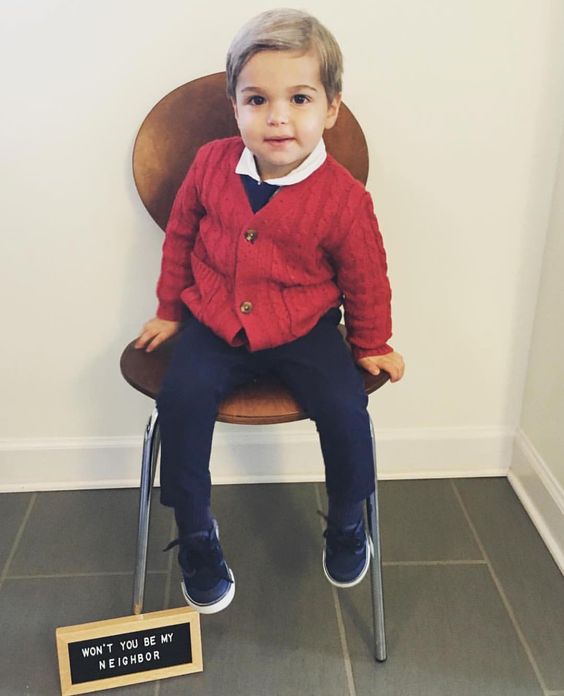
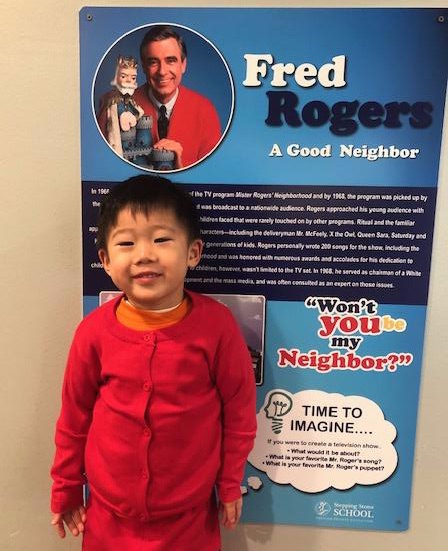
Won't You Be My Neighbor?
- How does the song make you feel?
- Can you create a dance that expresses the meaning of the song?
Fred Rogers once said that when he saw scary things, his mother would say, “Look for the helpers. You will always find people who are helping.”
- Can you make a list of people who are helpers when you feel sad, lonely, or scared?
- How might you thank the helpers?
Won't You Be My Neighbor
It’s a beautiful day in this neighborhood,
A beautiful day for a neighbor.
Would you be mine?
Could you be mine?
It’s a neighborly day in this beauty wood,
A neighborly day for a beauty,
Would you be mine?
Could you be mine?
I have always wanted to have a neighbor just like you,
I’ve always wanted to live in a neighborhood with you.
So let’s make the most of this beautiful day,
Since we’re together we might as well say,
Would you be mine?
Could you be mine?
Won’t you be my neighbor?
Won’t you please,
Won’t you please?
Please won’t you be my neighbor?
|
|
Art & Creative Expression
|
Make a Neighborhood Map
It is a great way for your children to represent their experiences!
Maps help children make meaning of their world as they draw representations of the special places and things that are important in their everyday lives. Each of these simple street maps have their own story behind them!
- First have your children create their own roads with crayons.
- Sharing their Adventures - The roads tell a story and represent unique experiences. Have your children start by telling a story first and then “map it out."
- Adding Special Places - Once your children have designed their street maps, they can place house-shaped sponges into colorful paint.
- Then press the house-shaped sponges on their paper!
- This activity combines the process of drawing and sponge painting, and each map will be uniquely designed to represent what is important to each child!
Such a fun process!
|
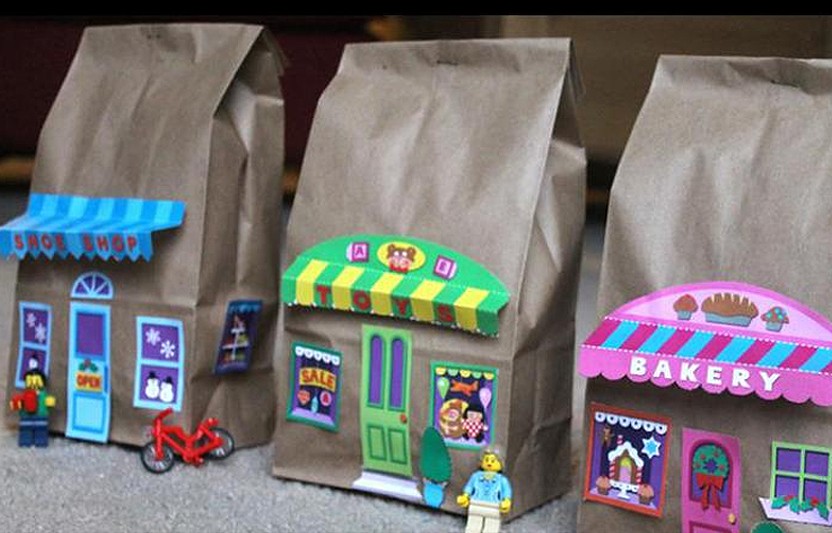
Paper Bag Village
Looking for a fun activity that is easy and fun? Here’s a paper craft to try at home. You’ll have a tiny town your child can call their own.
What You’ll Need
What to Do
2. Fold the awnings at the dotted lines.
3. Tape or glue the windows, awnings, and doors to the lunch bags.
4. Stuff the bags with old newspaper, then tape them shut.
|
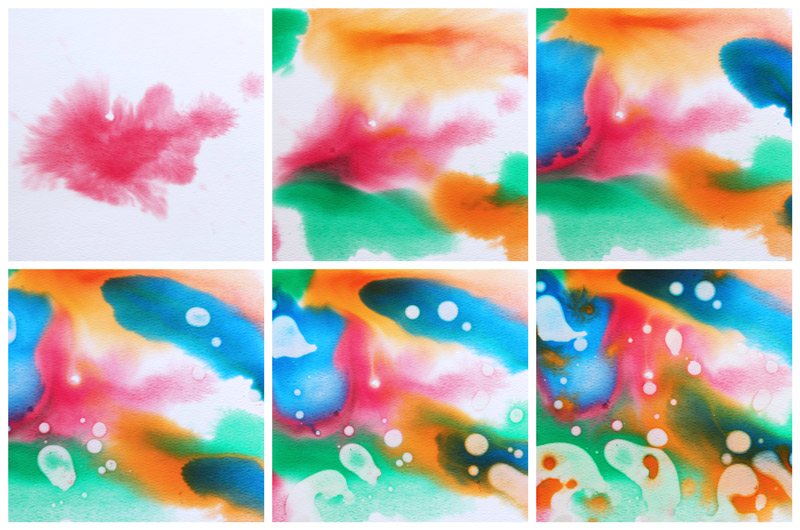
Water and Oil Art
Use this project as an introduction to the concept that oil and water don’t mix. Show your child that no matter how hard you try, these two liquids will avoid each other at all costs! Oil will either float on top or through the watercolors or, if applied to the paper first, prevent the watercolors from absorbing into the paper.
Materials
- Liquid Watercolors
- Watercolor Paper
- Eye Droppers
- Cooking Oil
- Trays or plates
- Paint containers
Instructions
- Step One Mix your liquid watercolors and water in individual containers. Pour cooking oil into one separate container.
- Step Two Place your watercolor paper in a tray.
- Step Three Using an eyedropper or paintbrush, apply watercolors on the paper.
- Step Four Using an eyedropper drop oil onto the paper and watercolors.
- Step Five Repeat these steps as desired. Before the art turns into a mess of brown I suggest limiting the number of times you repeat the process. If your children are excited to do this, have multiple pieces of paper/trays on hand for them to make more art!
- Step Six Without disturbing the mix too much move to a safe location to dry.
- Step Seven Let dry for several hours or overnight.
The fun thing about this project is watching how the artwork changes as it dries. The oil punches out the color over time. And in case you are worried about oily art, over the course of a day or two the paper should dry out completely. To hasten the process hang the artwork up to drip dry or move the artwork to newsprint once the watercolors have absorbed into the paper.
|
What's your story, morning glory?
How did you experience Mister Rogers’ Neighborhood? Share your videos, photographs or a short story about what Mister Rogers and the show means to you. There are two ways to share:
Upload
text, photo, video, or audio using the tool
Upload
Share
using the tag #ItsABeautifulDay or #BeMyNeighbor
|
|
Writing and Literacy Readiness
|
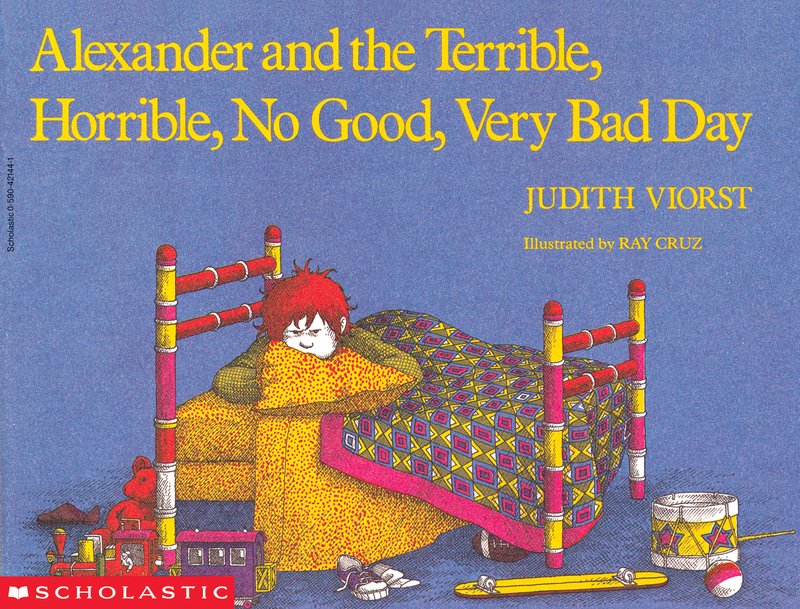
Alexander and the Terrible, Horrible, No Good, Very Bad Day
Written by Judith Viorst and Illustrated by Ray Cruz
What else could go wrong in Alexander's day? He woke up with gum in his hair. Then his best friend left him high and dry, and there was no dessert in his lunchbox. Will Alexander's day get better? What turns out to make a difference?
|
Mr. Roger’s Neighborhood Books for Parents and Older Teens
Mr. Rogers Books for Children
|
Picture Books to Develop Emotional Intelligence
- Check out some of these great titles to teach kids how to identify their own emotions (and others) and how to process them.
- Today I Feel Silly Other Moods That Make My Day by Jamie Lee Curtis, illustrated by Laura Cornell
- Llama Llama Mad at Mama by Anna Dewdney
- One by Kathryn Otoshi
- Glad Monster, Sad Monster by< Ed Emberley, illustrated by Anne Miranda
- Millie Fierce by Jane Manning
- In My Heart: A Book of Feelings by Jo Witek, illustrated by Christine Roussey
- The Way I Feel by Janan Cain
- Have You Filled a Bucket Today?: A Guide to Daily Happiness for Kids by Carol McCloud
- Alexander and the Terrible, Horrible, No Good, Very Bad Day by Judith Viorst, illustrated by Ray Cruz
- Grumpy Bird by Jeremy Tankard
- The Grouchy Ladybug by Eric Carle
- The Quiet Book by Deborah Underwood, illustrated by Renata Liwska
- My Many Colored Days by Dr. Seuss, illustrated by Steve Johnson and Lou Fancher
- The Feelings Book by Todd Parr
|
|
Mathematical
& Scientific Concepts
|
July is National Ice Cream Month!
Homemade Ice Cream in a Bag Science Experiment
Have you ever tried this awesome edible ice cream science experiment? Whether you make it inside or outside, make sure you have a pair of warm gloves ready. This homemade ice cream in a bag recipe is a chilly chemistry experiment for children!
Making homemade ice cream is actually quite easy and a good workout for the arms! It does require some adult supervision and assistance. A good pair of gloves are needed as this science activity does get very cold.
It’s summer, and July is National Ice Cream Month so instead of heading to the local ice cream shop, grab a few simple ingredients and head outdoors. Children can learn just how their ice cream is made… with chemistry!
INGREDIENTS:
- 1/2 cup half and half (cream and milk)
- ¼ tsp vanilla
- 1 TBSP sugar
- 3 cups ice
- ⅓ cup kosher or rock salt
- Gallon size zip top bag(s)
- Quart size zip top bag(s)
- Sprinkles, chocolate sauce, fruit (optional)
HOW TO MAKE ICE CREAM IN A BAG
STEP 1. Place the ice and salt in a gallon size bag; set aside.
STEP 2. In a smaller bag mix together half and half, vanilla and sugar. Make sure to seal the bag tightly.
STEP 3. Place the smaller bag inside the gallon size bag. Shake the bags for about 5 minutes until your milk is solid.
Make sure to use gloves as the bag gets very cold.
Time to enjoy your yummy homemade ice cream!
TURN IT INTO AN ICE CREAM SCIENCE PROJECT
If you would like to take your homemade ice cream in a bag recipe and turn it into a science experiment, try these suggestions:
- What happens if you don’t use salt? Set up two bags for making ice cream but leave the salt out of one bag.
- What happens if you use a different type of salt? Set up two or more bags for making ice cream and choose different types of salt to test!
- What happens if you swap out the milk for the heavy cream? Or what happens if you try another type of milk like almond milk. Set up two or more bags for making ice cream and choose different types of milk to test!
ICE CREAM SCIENCE
The chemistry behind ice cream is pretty sweet!
The magic is in the salt and ice mixture in the bag! In order to make your homemade ice cream, your ingredients need to get very cold and actually freeze. Instead of placing the ingredients for ice cream in the freezer, you mix together salt and ice to make a solution.
Adding salt to the ice lowers the temperature at which water freezes. You will actually notice your ice melting as your ice cream ingredients start to freeze.
Shaking the bag allows the warm cream mixture to move around to allow for better freezing. Plus it also creates a little air that makes the ice cream a bit fluffier.
Is ice cream a liquid or a solid? Homemade ice cream changes states of matter. Also more chemistry! It starts out as a liquid but changes to a solid in it’s frozen form, but it can go back to a liquid when it melts. This is a good example of reversible change as it’s not permanent.
You will definitely notice that the bag becomes much too cold to handle without gloves, so please make sure you have a good pair of gloves to shake it with.
|
|
By Deborah Farmer Kris
On afternoon when I was little girl, my mom found me hugging the television set during the closing credits of Mr. Rogers’ Neighborhood. “I love you, Mister Rogers,” I whispered.
My own daughter was a toddler when Daniel Tiger’s Neighborhood debuted. As I heard that familiar theme song for the first time in 30 years, my eyes filled with tears. I suddenly remembered how Mister Rogers had made me feel; it was like getting a hug from an old friend.
Angela Santomero, the creator of
Daniel Tiger’s Neighborhood
and “Fred’s number one fan” told me that she created Daniel Tiger to honor Fred Rogers and share his approach to teaching social-emotional skills with a new generation of parents and children. “There’s a strong need for the ‘Freddish approach’ to life,” said Santomero, including “speaking to kids in an honest, open, genuine, and respectful way.”
What’s Mentionable is Manageable
Fred Rogers approached the world – and his conversations with kids about the world – with a “fearless authenticity.” He treated children’s concerns with dignity, from the loss of a pet to the fear of going down the drain. For example, when he arrived on set one day and found a dead goldfish in his aquarium, he used this unexpected moment to talk to his young audience about death and to share childhood memories about how he felt when his dog had died.
Roger’s factual, compassionate responses to children’s questions and worries were rooted in one of his guiding principles: “What is mentionable is manageable.” Or as Santomero put it, “ If we can talk about it, we can deal with it.”
Managing “Big Feelings”
Children can be easily overwhelmed by “big feelings,” and the intensity of these emotions can be scary and confusing. Fred Rogers helped adults step into the shoes of kids, reminding them, “Young children don’t know that sadness isn’t forever. It’s frightening for them to feel that their sadness may overwhelm them and never go away. That ‘the very same people who are sad sometimes are the very same people who are glad sometimes’ is something all parents need to help their children come to understand.”
Rogers modeled helping kids develop an emotional vocabulary – often through music, with songs such as “What Do You Do with the Mad That You Feel” and “There are Many Ways to Say I Love You.” He showed us how adults can provide a safe place for kids to talk about their feelings and receive support in solving their problems. Santomero described his strategy this way: “You feel your feelings, you label them, and then you solve the problem.
Simple Strategies to Help Kids Thrive
Fred Rogers was always addressing two audiences. First, he offered children lessons about friendship, emotions, and growing up. And he also offered
parents simple strategies for helping their children grow and thrive: how to talk to kids, how to listen, and how to use song, story, and make-believe to communicate important ideas.
Fred Rogers’ techniques were grounded in his study of
child development
, said Santomero. “There was a reason behind everything he did. It was all very child centered. You get down on the floor and play with them, and then you see what comes from that interaction.” He modeled how to “respectfully communicate with preschoolers by giving them time to think and by speaking directly to them — with love, warmth and a strong connection.”
“It’s You I Like”
For Fred Rogers’ generations of fans, it wasn’t just the strategies that we responded to. Rather, it was how we felt during our “conversations” with him. In his gentle way, he communicated his belief in the inherent dignity of each individual, reminding us that “You are special to me” and “It’s you I like”:
- It’s you I like,
- It’s not the things you wear,
- It’s not the way you do your hair
- But it’s you I like.
- The way you are right now,
- The way down deep inside you.
As Santomero said, the message “You are special” isn’t about “effortless trophies.” Rather, it’s about “the power of one person who can look you right in the eye and say, ‘You are going to do something great in this world.’ As you watched Mister Rogers’ Neighborhood,
you felt, through the TV, that Fred believed in you.”
Recently, a friend told me that this core message from Mister Rogers offered her a light in the darkness of a difficult childhood. “I can’t even read his name without tearing up,” she said. “During those rough years, Sesame Street taught me to read, and Mister Rogers
taught me to hope.”
|
|
Simple Puppets to Make and Use!
Puppets have been around for centuries and have entertained people of all ages. What better way to get your child to take up an interest in crafts than by introducing puppet-making? Fun and simple, it is guaranteed that your children will love every moment they spend creating their own little puppets! Here are some of the best puppet craft ideas for you and your children. These are great ideas to improve their fine and gross motor skills!
1. Puppets Made With Popsicle Sticks:
This is a great idea especially for toddlers as it is one of the easiest ways to make puppets. All you need is a Popsicle stick (or a few), glue and a picture or drawing of a favorite cartoon character to cut out. The next step is to apply glue on the back of cutout picture and paste it onto the stick!
2. Puppets Made With Paper Bags:
This type of puppet requires a paper bag and construction paper. Place the paper bag flat with the bottom flap up and draw a face of your choice on the construction paper. Glue the drawing on the flap and the paper bag will serve as the body. All your child needs to do is place is hand inside the bag and get his fingers up to the flap part to move the puppet’s mouth.
3. Puppets Made With Cereal Boxes:
The first thing you need to do is draw a line across the middle of the empty box and down its sides as well and cut along the lines. Cut a few openings not too close to the top part of the box for your child’s hands. Paint the box with any color of your choice and get wriggly eyes, buttons, etc. for the eyes. You can paint on the nose, use yarn for hair and create a box puppet just the way you want!
4. Fabric Puppets:
Take two pieces of felt fabric of any color. With your little one’s hand on the felt, make a cut out and draw a puppet shape on it. Make sure that it is big enough to fit your little one’s hand once it is completed. Clip the fabric piece and use it as a pattern to make a second piece. Apply glue to one of the piece’s sides and join the two pieces together. Once it has dried, you can decorate the puppet as you like.
5. String Puppets:
You can make a snake or dragon string puppet using 6 toilet paper tubes, yarn or string, glue, construction paper and paint. Two holes will need to be punched on either side of the heads of two toilet paper tubes. Then run the yarn through the holes and pull it until you have an equal length of yarn on both sides. Now thread four more tubes through both lengths of yarn, with the last punched tube threaded as the first one was and the string tied up between the holes. Draw a dragon or snake on construction paper and work the puppet with the strings!
6. Animal Stick Puppets:
Draw or print out pictures of animals and make a neat cut-out. Stick them on to drinking straws or craft sticks after coloring them with crayons or markers. Your little one can collect these puppets and pretend to own a zoo. Color the animals and you are ready to have some puppet fun.
7. Puppets Made With Yarn:
These require a little bit of fabric, yarn, sticks, glue and a marker or small buttons. Form a small head shape, with cotton or wool covered with the fabric. Glue on the yarn to make hair; use it below the head as well. Insert a stick in the center to make the puppet move. With a marker or buttons, you can create a face for the puppet.
8. Rubber Glove Puppets:
If you have some old rubber gloves lying around in the house, it’s time to put them to some great use.
Open up your craft box to your child! She will be delighted to grab some googly eyes, pretty sequins and wool and go ahead and cut off the fingers of the rubber gloves.
9. Sock Puppets:
Do you have some old socks lying around that you think you can put to some good use instead of just throwing them away? We have just the thing you can do.
Give these old colorful socks to your child and let her fix them up with some eye buttons and wooly hair.
Now, your old socks are transformed into fun finger puppets, ready for a great fun show.
10. Finger Puppets Made With Paper:
This makes a wonderful first-time crafts project for little tots as it is simple and easy. Take some construction paper, glue, scissors and crayons. Get your child to draw a picture of a favorite animal and cut out a hole for the fingers. For example, if you draw an elephant, cut out a hole in the middle so that your child can put his finger to make its trunk!
As you can see, it is not difficult to create puppets at home. With the tips above, your kids will have a great time creating puppets of their choice using simple easy-to-use items. Do remember to use child-friendly scissors and other items and let your little ones allow their imagination to soar!
|
|
Cognitive & Phonological Development
|
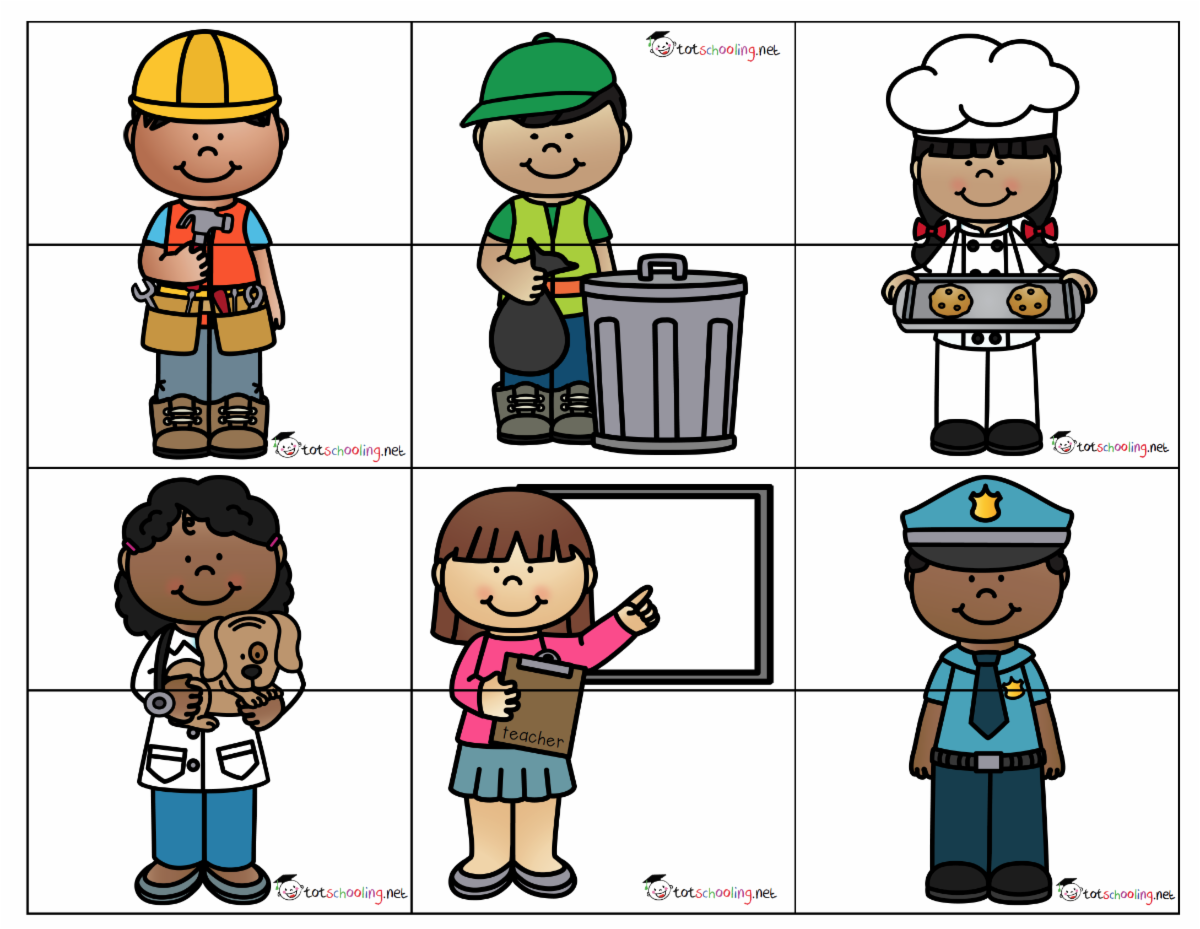
Community Helpers Puzzles
Mr. Rogers encourged us to look for the helpers. These community helpers puzzles can encourage your children to "look for the helpers" while working on their cognitive development skills!
“When I was a boy and I would see scary things in the news, my mother would say to me, ‘Look for the helpers. You will always find people who are helping.’ To this day, especially in times of ‘disaster,’ I remember my mother’s words and I am always comforted by realizing that there are still so many helpers – so many caring people in this world.”
Fred Rogers
|
PBS Resources to Help Families During COVID-19
We understand that many families are now trying to find their new "normal" in light of COVID-19. PBS ia an organization committed to providing quality entertainment and resources for children and families. Fred Rogers Productions is providing resources for families. Here is a list of all of the virtual events, activities, and other social initiatives PBS is sharing online.
- PBS is sharing one activity, craft or recipe each day on their Facebook, Twitter, and Instagram pages.
- Daniel Tiger's Neighborhood
- Watch on the PBS KIDS Video Player and Amazon Prime
- "How to Talk to Your Kids About Coronavirus" via PBS KIDS for Parents
- "How You and Your Kids Can De-Stress During Coronavirus" via PBS KIDS for Parents
- When Something Scary Happens: Resources to Help Families Cope in Emergencies and Other Challenging Times via PBS KIDS for Parents, includes activities and tips such as Draw Your Feelings, How to Prepare Children for Unexpected Events and Emergencies, and Helping Children Cope After a Crisis or Emergency.
- "Celebrate a special birthday with Daniel Tiger and Tigey," a song to sing when families cannot celebrate birthdays in person, via PBS KIDS
- Sing along to your child's favorite songs from Daniel Tiger's Neighborhood and watch clips from the show in the free Daniel Tiger For Parents App, via PBS KIDS in English and Spanish
- "Daniel Misses Grandpere," a digital storybook to help children manage feelings of missing loved ones during social distancing, via PBS KIDS for Parents
- Virtual Storytime with Matthew Cordell, author and illustrator of "Hello, Neighbor! The Kind and Caring World of Mister Rogers" on the Fred Rogers Productions Facebook page
- Activity sheets and other tips at PBS KIDS for Parents
- Mister Rogers' Neighborhood Watch on the Mister Rogers' Neighborhood Legacy Website, the PBS KIDS Video Player, and Amazon Prime
- Draw Along and Read with Luke Flowers, illustrator of "A Beautiful Day in the Neighborhood: The Poetry of Fred Rogers" live event on the Fred Rogers Productions Facebook page
- Peg + Cat Watch on the PBS KIDS Video Player and Amazon Prime
- Virtual Story Time with Peg + Cat co-creator Billy Arsonson on the show's Facebook page
- Virtual Story Time with Peg + Cat co-creator Jennifer Oxley on the show's Facebook page
- Activity sheets and other tips at PBS KIDS for Parents
- Odd Squad Watch on the PBS KIDS Video Player and Amazon Prime
- "Odd Squad Healthy Habit #111: How to Stay Away from Germs," video from The Big O with tips for staying healthy, via PBS KIDS
- "Odd Squad Healthy Habit #339: Social Distancing," video from The Big O with tips for staying healthy, via PBS KIDS
- Activity sheets and other tips at PBS KIDS for Parents
|
|
Emotional & Social Development
|
Benefits of Puppets
The benefits of using puppets include:
- Oral Language: Puppets are exciting and fun! Children are naturally encouraged to speak to and with puppets, which is a great way to get your children to open up and talk.
- Social Emotional Skills: Puppets can be used to act out social stories and practice social skills.
- Music: Puppets and music go hand in hand! A puppet can make music and movement more interesting and help teach the words and movements to new songs.
- Motor Skills: Manipulating puppets is a great way to practice gross and fine motor skills.
- Behavior: Children can learn appropriate behaviors from puppets. Puppets can even introduce and explain rules.
- Retelling: Children can use puppets to retell familiar stories
|
How To Encourage Children
When you’re used to recognizing kids with empty praises, using encouraging phrases can be a little awkward. Since saying ‘good job’ is a favorite praise among parents and caregivers, here is a list of alternative phrases you can use instead of saying ‘good job.'
Instead of saying ‘good job’ when children do well on tests/exams, you can say:
- You worked really hard to understand the material. Your hard work and effort paid off.
- Look at that! You spent a lot of time studying and your test score shows it.
- Wow! You got ‘X’ questions out of ‘X’ correctly. How did you do that?
- Your grade improved compared to your last test score. What strategies did you use this time?
- Wow! You answered all the questions correctly. How does that make you feel?
Instead of saying ‘good job’ when you child dosen't give up, you can say:
- You didn’t give up. What made you keep going?
- I can tell you really wanted to ___________. You kept trying different strategies until you found one that worked.
- Wow! That took a lot of time and effort, and you still never gave up.
- You did it!
- You really challenged yourself and got the job done!
Instead of saying ‘good job’ when your children excel at sports:
- Your practice is paying off. You’re getting better at _______ (name something specific i.e. dribbling, passing, hitting the ball, etc.)
- You scored and helped your team win
- Your teammates were all cheering for you. How did that make you feel?
- Congratulations! You did what the coach asked you to do and really helped your team out.
- You were determined and kept trying until you scored. What did you think when you scored?
Instead of saying ‘good job’ when kids try hard and still fail, you can say:
- I see that you really want to get this right. What else can you try?
- OK, what are we missing? What’s another strategy we can try?
- Who else might be able to help you solve this problem? Should we talk to__________ (i.e. the teacher, the coach, parent, etc.)
- You really want to figure this out. Is there another way we can look at this problem?
- You’re really challenging yourself. Can you think of another way to do this?
Instead of saying ‘good job’ when a child shows off a piece of work, you can say:
- Look at that! I can tell you put a lot of work in it.
- Tell me about what you did.
- Show me more
- Wow! How did you do that?
- That looks like it took a lot of effort!
|
|
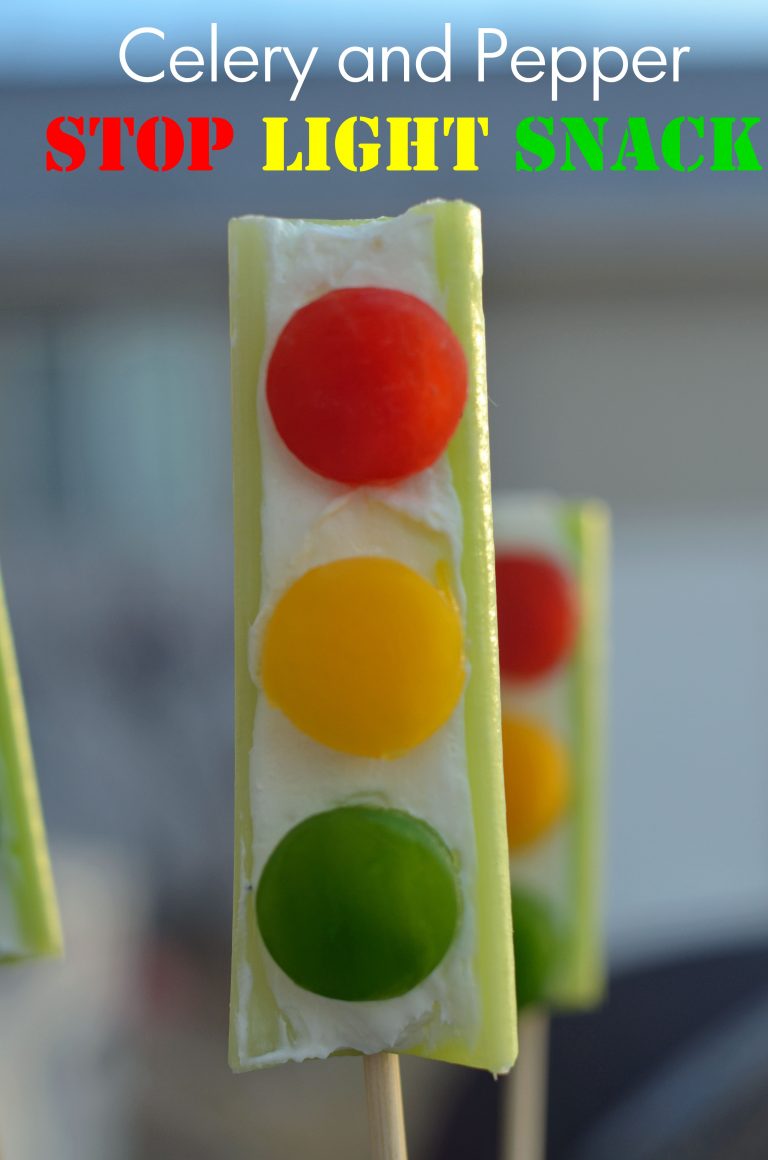
Sweet and Savory Stop Lights
|
|
In order to make this sweet treat you will need:
- 1 Graham Cracker
- Cream cheese to spread
- Strawberries, sliced
- Apricots, halved
- Kiwi, sliced.
Spread the cream cheese onto the graham cracker and place the strawberry, apricot, and kiwi slices on top! A simple stop light treat!
|
|
In order to make this savory treat you will need:
- Celery
- Cream cheese
- Red, yellow, and green bell peppers!
Simply spread cream cheese onto a stick of celery, cut into 3 inch stalks. Cut circles out of peppers in all three colors. Arrange your circles on the celery like a stop light!
|
|
|
|
|
|
|