May 2018 Newsletter 
New Work: Mid-October

I had some yellow fabric with strong dark marks and it reminded me of dark twigs against golden fall leaves.  I ran with that inspiration and created Mid-October, shown below.
"Design Your Own Nature Quilt" online  class starts June 1st
Imagine the thrill of interpreting your own photo in fabric! That's what you'll be doing in this no-fear class.

I'll walk you through multiple exercises which will give you the skills and confidence you need to tackle the design phase. Along the way you'll be learning about: i dentifying and placing a focal point, h ow cropping can help a composition, i nterpreting a photo loosely, and much more.

Note: No artistic skills are needed, but artistic courage is required.

Part One $35, 3 lessons
Making a New Class Sample

The only problem with my "Design Your Own Nature Quilt" class is that I keep selling the class samples.  So, it's time to make a new one.

This is my inspiration photo.  Great, right?  But, should it be horizontal?  Cropped?  Have fewer flowers?  I'll be posting about these and other decisions on my blog.  Follow along and ask questions if you have them.

"Conversing with My Fabric," a New Lecture
Oh my.  I presented my new lecture, "Conversing with My Fabric," last week and it was a huge hit!  I was so pleased, as I had poured TONS of work into it.

But, the results were worth it.  I enjoyed presenting it and my audience was enthralled.  We had so much fun together.

This PowerPoint lecture is about my process, how I make decisions, and some of the wacky ways I've created art quilts over the years. I'll be showing some snippets from it here in my newsletter and on my blog.  

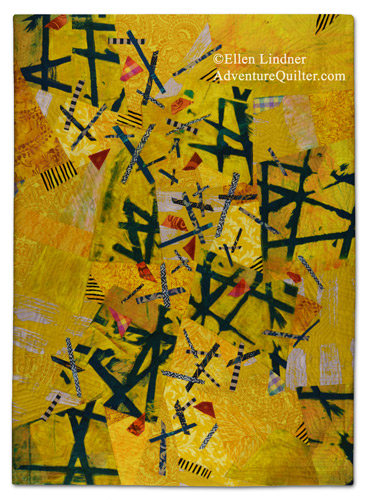
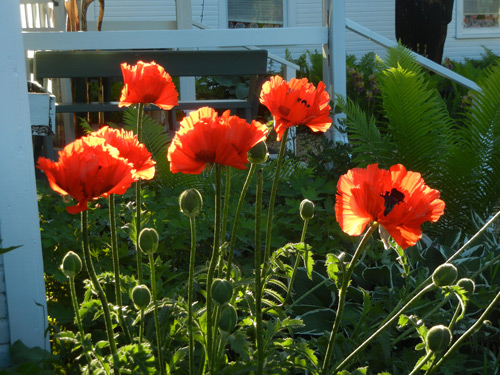
One tip I shared is how you can use tulle (bridal netting) to alter colors or create shadows.See the two examples below.  On the left, two layers of black tulle were used over the fabric center right.  It was initially too bright, so the tulle cut hat down.  On the right, four layers of black tulle were used to create the foreground shadows.

In each case, the desired tulle shape was drawn, tulle was cut larger than needed and then pinned securely in place. The shape was stitched with monofilmentt thread and then trimmed closely.  Voila!  A very useful technique.

I'd love to come share this lecture with your guild!  Learn More
What's New

I've been working on a quilt using a variety of indigo fabrics.  Since I didn't want to cut into the designs, I've been using a gridded format.  To see it all, read "Composing with Indigo," below.

New blog posts:

Have you  subscribed to my blog yet? If not, I hope you'll do so. Go to the blog  and add your email address to the subscribe box, top right.  You'll get an email in your inbox once or twice a week.
  
Enjoy the adventure!
Ellen Lindner
I f you've enjoyed this newsletter you may also be interested in my free articles and eBooks , (available immediately.)
Adventure Quilter
321-724-8012
[email protected]
http://adventurequilter.com